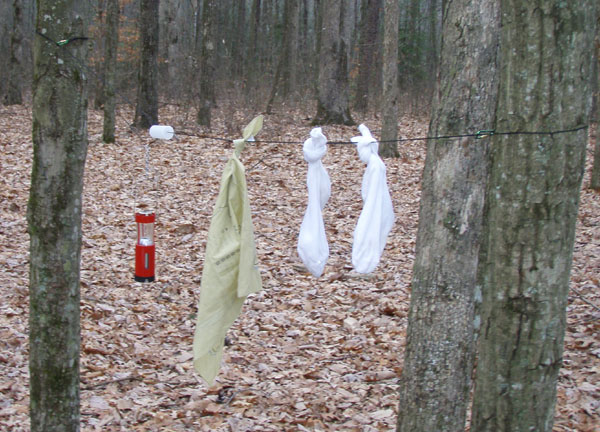
This is a silly little diversion, but I enjoyed thinking it out and it is a simple, quick build on the cheap, that delivers a product that may or may not be handy. Plus, unlike some of my other projects on here, this one requires no special tools or knowledge, so anyone can build one of these in the comfort of their own home. It has been a while since I sat down and made something, if you don’t count these posts, and have had my eyes open for a project of some sort to clutter up the workdesk. When I spotted the commercial version of this for sale at an outdoor shop last weekend, I thought it was a thoroughly useless item. I mean who needs string with some hooks in a 35mm film container, especially for $9.99. I honestly did not even look at it closely, but while driving home I kept thinking about it and decided to see if I could make a better one on my own.
Like Sam Gamgee, I am a strong believer in carrying a bit of rope, and I try to make it a habit, but even when I do not carry rope, I always try to carry some stout cord. It weighs less than rope and can be used in all sorts of ways. I have used cord to strap extra gear on the outside of my pack, to tie down a banging metal cup that I used to carry, to reinforce or repair a broken binding or as a makeshift leash for The Grimm Barguest. I have also spent countless trailside moments untangling cord that has become unravelled and magically wrapped itself around every item in my pack before finishing with a Gordian flourish. So the more I thought about a self contained cord storage system, complete with built in hooks, the more appealing it became. So I gathered up some materials and basic tools and went to work building, breaking, redesigning and nearly perfecting my self-contained camping clothesline.
So, what do you need?

Ingredients:
1- 35mm film container
1- length of 1/8″ or smaller nylon-style cord, I used 4-5 yards
2- very small carabiners or snap hooks
I had a bunch of old 35mm film containers stashed, but if you need them most photo centers will give you as many as you want for free. I have a bunch of great cord from REI, but for the purposes of this build I picked up some simple cord in Wal-Mart’s sewing department for $1.97. For the prototype I used a pair of small carabiners I had laying around the house, but I am now using plastic snap hooks from REI that I picked up for $1.00 a pair, they are lighter, cheaper and just work better.
Tools:
Drill with 1/8″ bit or a small awl, anything to make a small hole in the canister
A source of controlled fire
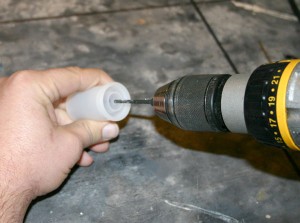
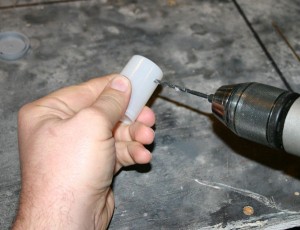
The first step is to drill the proper holes. Drill two holes, directly across from each other about 1/2″ from the bottom of the 35mm canister. The easiest way to do this is to use a bit long enough to drill them both at once, this makes it fairly likely that the holes will line up, although the line-up is by no means critical. After you have those holes drilled, drill a hole in the center of the cap.
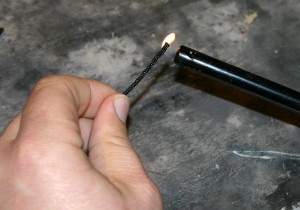
Now, cut a length of cord 4-5 meters long, that 12-15 feet for our American cousins. Using great care, and the proper safety precautions, etc. apply your controlled flame gently to the ends of the nylon cord to keep the ends from fraying. It is only necessary to melt the very ends of the cord, and be aware that nylon cord can catch fire and burn if you are not gentle in your application, also remember that you are essentially melting plastic, so refrain from handling the melted ends until they have a chance to cool. Now you are ready for assembly.
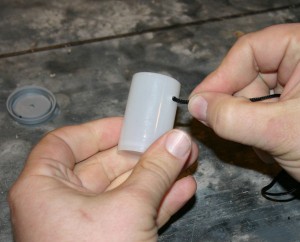
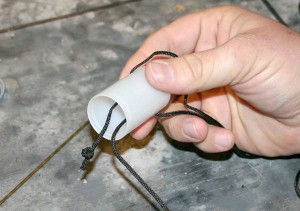
Run your cord through the bottom hasp of your plastic hook or carabiner. Take both ends of the cord and pass each one through the holes you drilled in the base of the canister. Pull a few inches of one side of the cord through the first hole and tie a series of knots in this end of the cord. These knots are to make sure it cannot slip back out of the hole in the canister. Once you have you knots tied, take up the slack by pulling the rest of the cord through the second hole. Now you are ready to thread the free end of the cord through the bottom side of the lid and attach your hooks. In my prototype I just tied a simple loop in the end of the string and attached a carabiner, for the plastic hook I tied simply tied the simple loop around the bottom of the hasp.
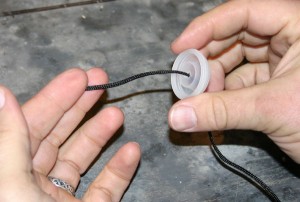
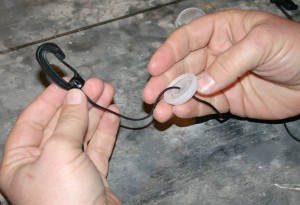
Now you are just about finished. Pull all the slack cord out of the container and slide the lid up to the bottom of the top hook. Take the cord just below the lid and begin to wrap it around two or three fingers until you have taken up most of the cord. Now stuff all of the cord inside and snap on the lid. Simple as can be.

I tried a couple of different methods on this, tying the cord together inside the container, making a series of loops, etc. but this was the best design. By passing the cord through the container twice and the lid you are able to use the container to take up slack when you hang the clothesline, simply by sliding the container up until the line is taut and then placing the lid in place, it’s a friction thing.
I will be the first to admit that this is a nearly useless little trifle, but it is fun to make and it does keep an extra 15 feet of cord in your pack without tangling and it already has hooks attached. Add a geocaching sticker and this might be a cool little signature item. After thinking it out, I made five of these in fifteen minutes, while watching the news, so the time investment is nominal, as is the cost. While searching for some better hooks, I also found this item at REI for $5.79, which by my figuring will pay to make 5 of these if you buy the 2 for a dollar hooks. This is a great way to recycle those 35mm film containers and give them a useful life after their careers in the arts and this is a fairly simple project that anyone can do. So there you go, I hope you enjoy my take on the self-contained camping clothesline.
Update: I carried this with me camping last weekend and it turned out to be a handy little item, as you can see from the first picture, I put it up as soon as we set up camp and hung my bandanna and liners on it to dry out and after the sun went down I hung a candle lantern on it. I thought it was a silly trifle, but having a quick and easy to set up clothesline was actually quite handy. Shows what I know.
Thanks Monkeybrad for the info on the self-contained camping clothesline. I too saw that in the same outlet and only took a glance when I saw the price, thinking “People will sell anything to those who will buy it”. I too have thought a lot about it since seeing it in Gander, but have not had the time to actually try making one. Maybe I will find the time now. Thanks for you article and Happy Geocaching!
Bruce
EverywhereActs1:8
lovely dyi idea.
i’ve carried one for years, but it is made of two thin bungees twisted together so no clothes pins are necessary:
Coghlan’s Bungee Clothesline
or you could make your own with some thin bungee stuff; it would be a bit larger, but still clever.
If you don’t have film containers, you could use old pill bottles.
That’s a great idea!