It seems like more and more of us are buying canoes, kayak and other small watercraft to integrate into our geocaching so I thought I would pass along this tip. Even a lightweight kayak (Scoot’s weighs 34 lbs.) is a pain to carry more than a couple of hundred yards, so I looked around and found a better way to transport our boats. There are several of these on the market, but most of them run about $100.00, so I looked at how they were made and came up with this one that you can make in less than half an hour with parts from your local home improvement store for around $30.00. I present “Monkeybrad’s Magically-delicious Personal Watercraft Conveyor to the Stars” or as Scoot calls it, a homebuilt kayak cart:
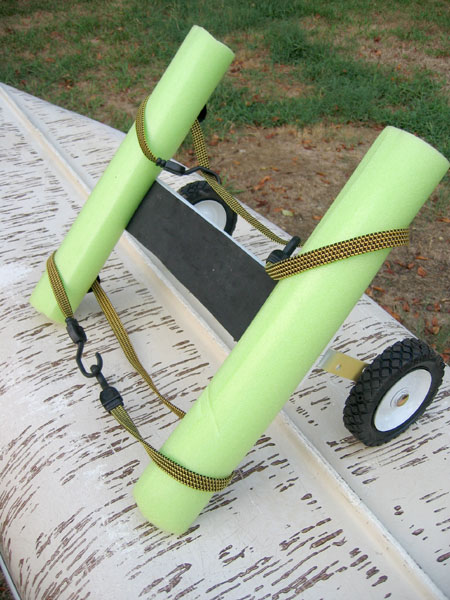
Just take this little set of wheels and place on the bottom of aforementioned watercraft like so:
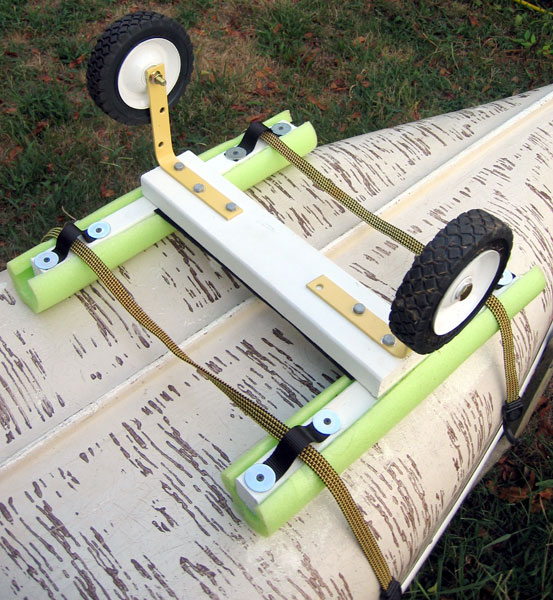
Then pull the straps up and attach them to anywhere convenient on your boat or just fasten them to each other over the top of the boat and you have a quick and easy way to transport your boat.
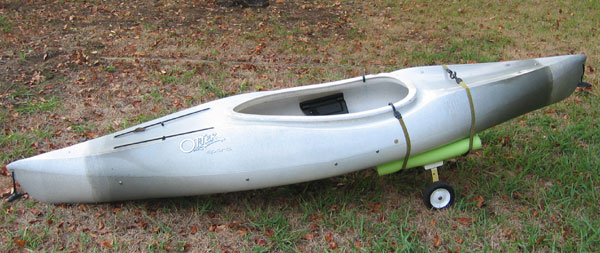
From the rear:
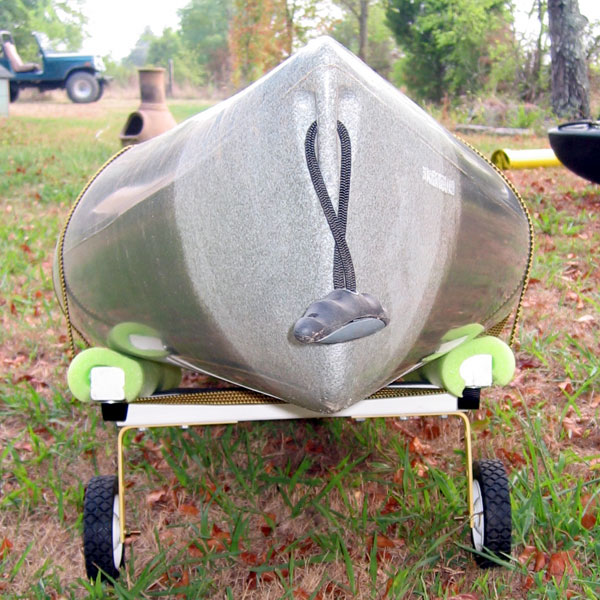
You can also use it to transport multiple boats if your stacking skills are up to the task:
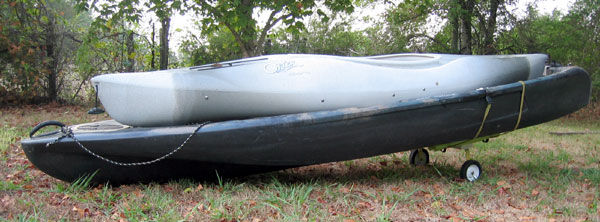
So how do you make one of these beauties?
First you will need a few things:
1- 18″ 2X4
2- 18″ 2X2
2- 6″ metal L brackets
2- lawnmower wheels, I used 7″
2- wheelaxle bolts (these will be with the wheels)
6- 1.5″ lag bolts
1- FunNoodle (the kids swim toy)
2- bungee type straps I used 42″ models
2 feet of webbing
8- 1.5″ drywall screws
8- washers
6- 3″ drywall screws
Some sort of heavy adhesive, I used liquid nails.
I picked up everything to make this at Lowe’s and Walmart for about $30.00.
1. Center 2X2’s on 2X4 base and attach with 3″ screws.
2. Use lag bolts to secure metal brackets to bottom of 2X4.
3. Attach wheels to brackets using wheelaxle bolts.
4. Cut webbing to make loops to hold the bungee straps.
Use 1.5″ drywall screws and washers to attach them to the base. You can skip this and attach the bungees directly to the base if you like, but this method allows you access to your straps if you need them for something else, and it allows for easy replacement if one breaks. After attaching the loops fit bungee straps through them.
5. Flip the cart over and cut the FunNoodle to fit the 2X2 arms, use adhesive to attach FunNoodle pieces to the arms. At this point I also adhesived some 3mm foam to the crosspiece, but it is purely cosmetic, as was my choice of lime green noodle and yellow brackets.
There you go, your own Kayak Cart for around thirty bucks and less than twenty minutes of construction. You can personalize it in any way, I ended up with my pastel lemon-lime scheme because that was the only color FunNoodle I could find. For a more sedate cart use gray foam pipe insulation.
I hope this is helpful for some of you, my yak weighs in at about eighty pounds so I was looking for a better way to get it to the water in places that did not have a boat ramp. This works like a charm. If you place the cart about 3/4 of the way back on the boat you can get a nice balance that makes it effortless to lift and pull. The other nice thing is you can load your gear into the boat and only make one trip. Once you get to the water you can strap the cart on top of the yak, I am sure you could also build this to fold up and stow inside the boat, but I have lots of room in mine so I did not worry about that. On that same note, you can change any of the dimensions to get a custom fit for your boat. Mine was designed to handle my large sit-on-top kayak, my wife’s standard kayak and our canoe. You may need to size up or down for your application.
I hope that some of you find this useful, there are many more elegant ways to solve this problem, but this one requires no specialized knowledge or crazy tools to construct.
The pictured “Birch” canoe is possibly the worst excuse for a watercraft ever marketed as such (I know from personal experience). It seems to be free of bondo here, so I guess we hadn’t actually tried to “float” in it yet 😉
This cart is a glorious invention, affordable invention. My very arthritic bones thank you for giving me a way to do that which has become increasingly difficult. Muchissma gracias you clever senor.
great idea. i went to lowes and got all the hardware and built the cart, only took me an hour. i was looking to build a nice cheap cart and place it close to the middle of the kayak, and it levels the kaysk out level and i have another small cart in the back and boy is it easy to pull down the road if the water or boat ramp is a distance away and your out camping. thanks again. you saved me some money. tks
I tried this but the holes in the L brace did not fit the wheel axle bolts. Did you have to make the holes in the L brace larger to fit the wheel axle bolts?
The holes in the brace I used worked as they were, but you may need to customize yours a little.
Ingenious, as they say! I will make one to haul the canoe and kayaks down the hill to the water, and back up. It’s the back up direction that’s a killer, and in consideration of that, I thank you for posting your simple, cheap, and useful invention!
I’ve been searching the web, looking for the best kayak cart. This one is definately the easiest and cheapest to build. Thank You.
Built one today for my new Native FX12. Found all the parts at Lowes and the lumber free from their scrap pill. Made mine 20″ wide and 8″ wheels with 8″ L braces.
Thank you for the post and encouragement.
Where did you buy the wheels WITH the wheelaxle bolts that fit?
Pretty sure that all the hardware came from Lowe’s for that one. The wheels and bolts are not packaged together, but they had all the parts to make it work.